Key takeaways
- Save a named preset after your first changelog screenshot — every release after that takes seconds to match.
- Capture the feature, not the whole page. Tight framing makes the new thing obvious without requiring the reader to orient themselves.
- Use a side-by-side collage for before/after improvements — one image communicates more than two separate screenshots.
- Export at 2x for embedded changelogs; use a 16:9 or 1:1 preset for the social version of the same release.
Why consistency matters more than polish
A single polished changelog screenshot is easy to do once. The problem is release 7, when you're in a hurry and the screenshot looks slightly different from the last six: different padding, different background, slightly different framing. That inconsistency accumulates and makes the changelog feel unmaintained even if the product is moving fast.
The goal of this workflow is repeatability first — so that every release screenshot matches the last with minimal effort — and visual quality second.
What to capture for a changelog screenshot
The changelog screenshot has one job: make the new thing immediately obvious to someone who already knows the product. That changes what belongs in the frame.
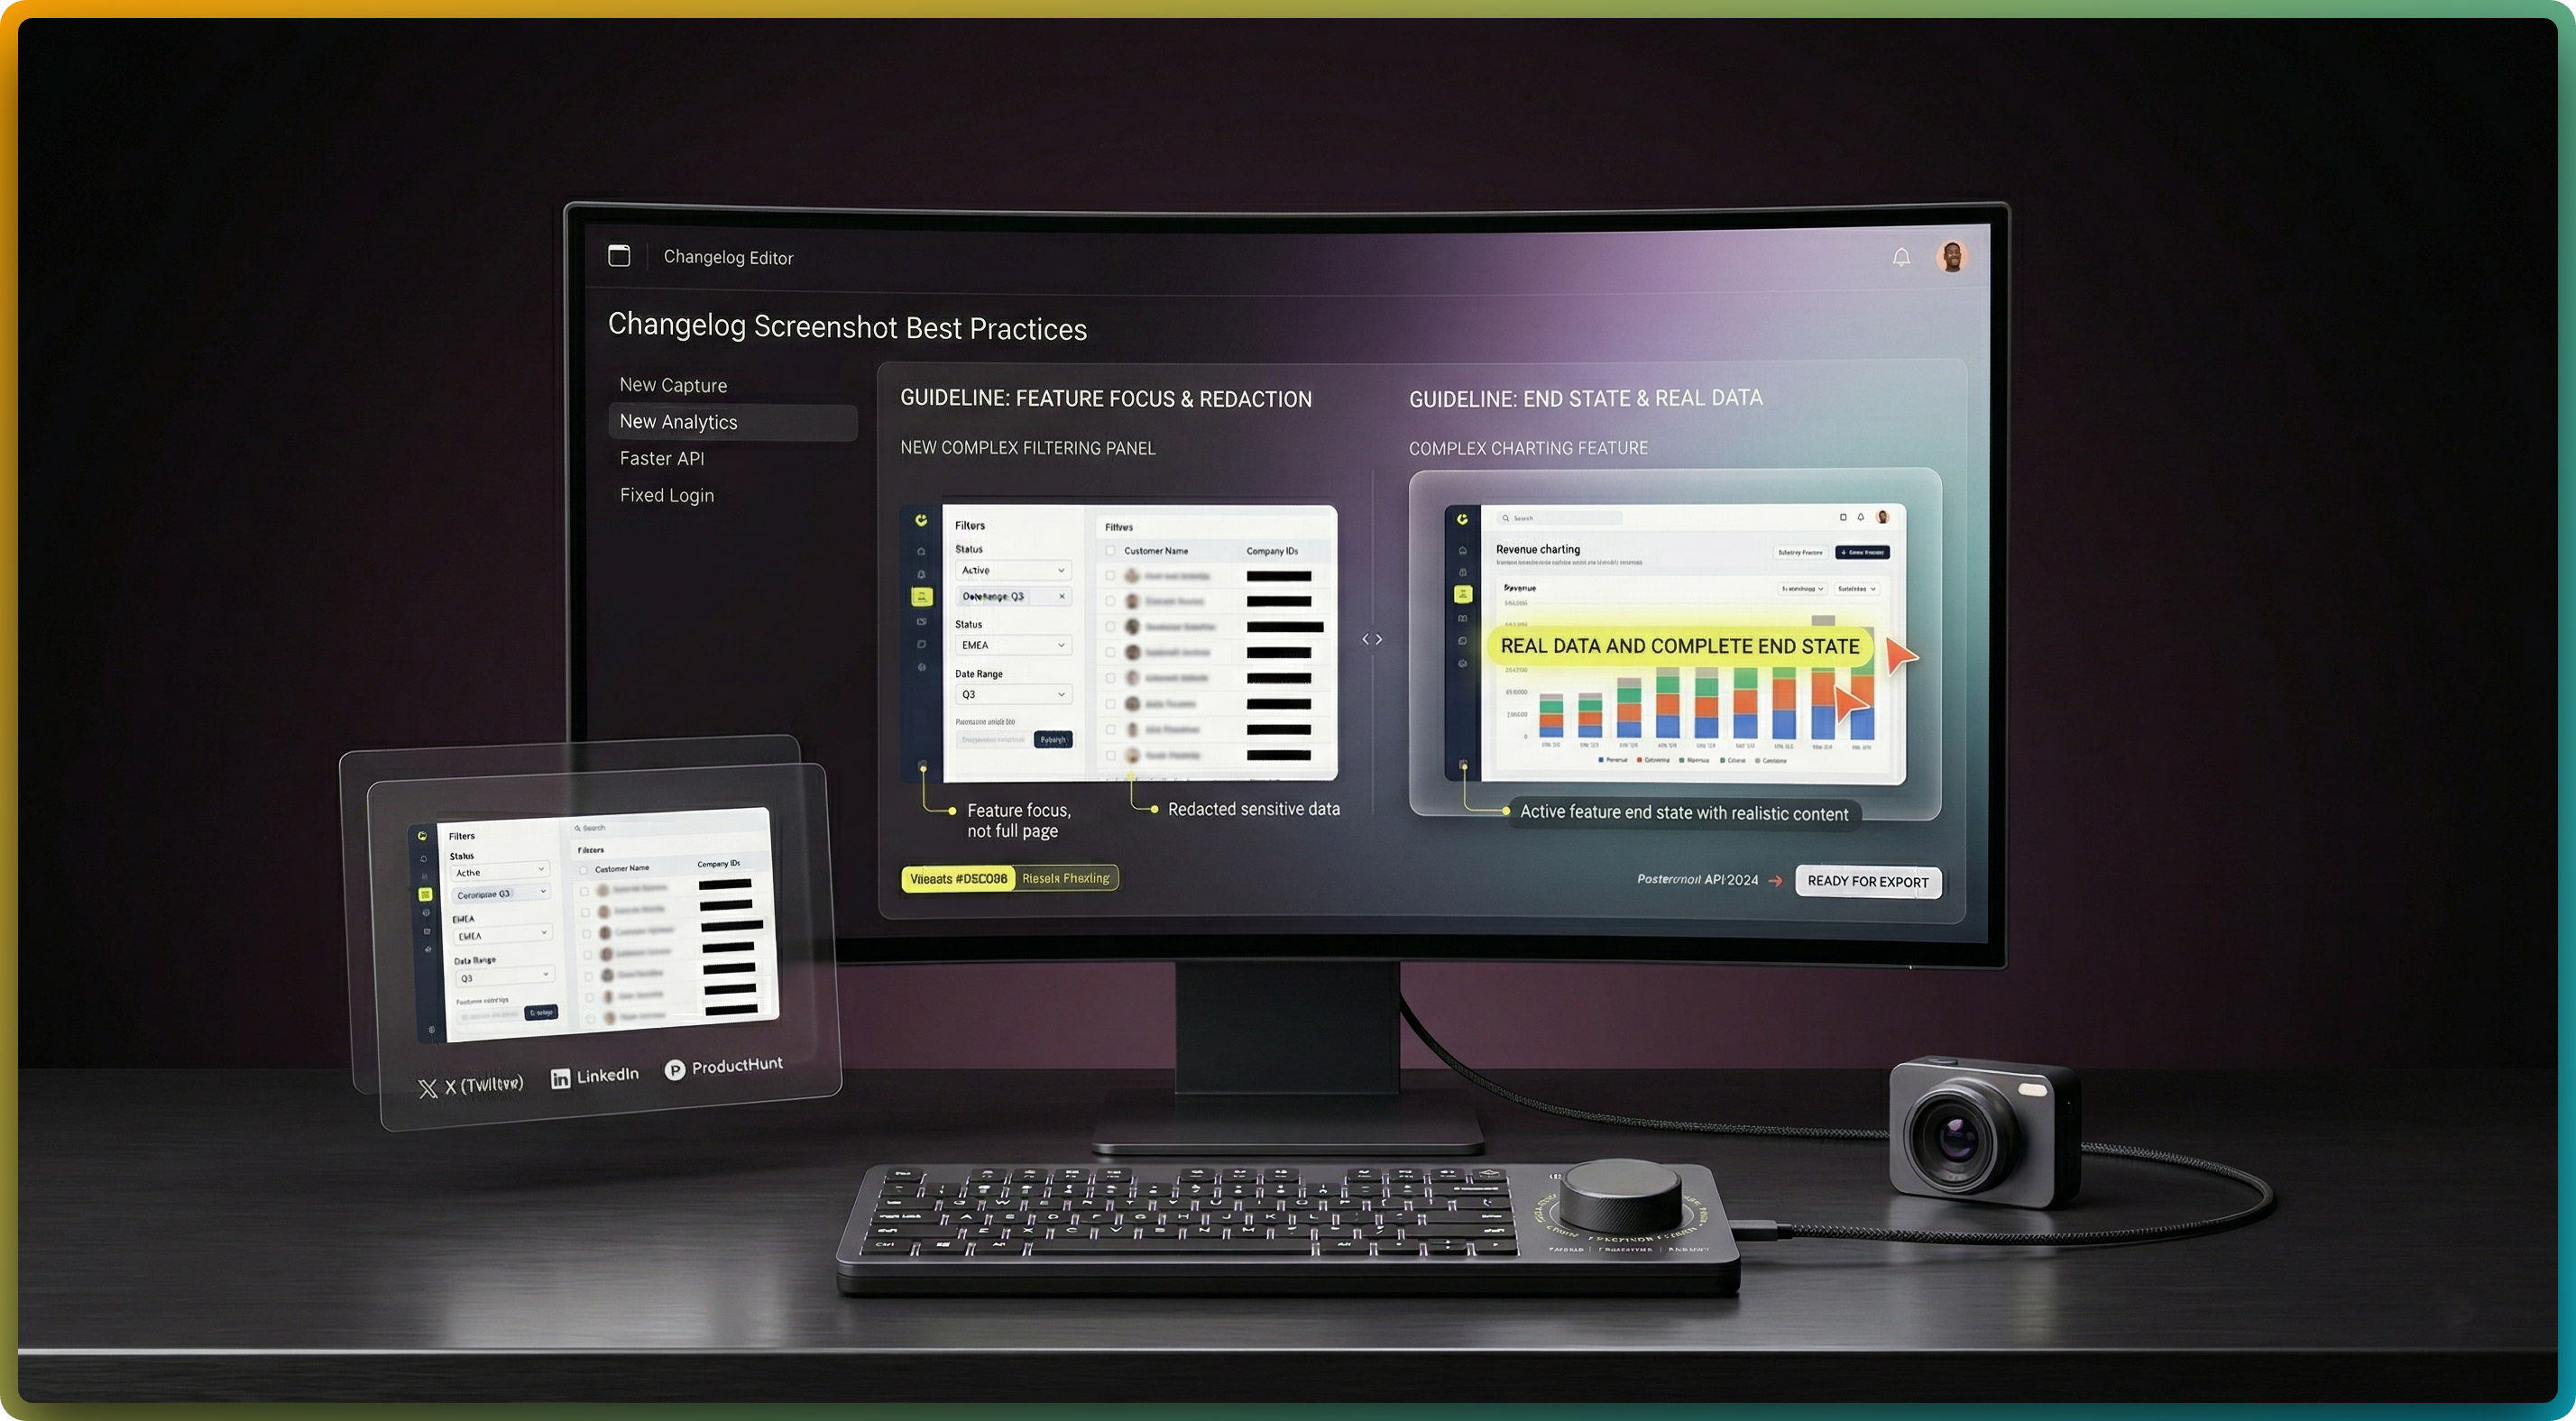
- Capture the feature, not the page. If you added a new filter panel, capture the filter panel with just enough surrounding UI to orient the reader — not the entire dashboard.
- Show the end state, not the action. Capture the UI after the feature is in use, not a blank or loading state. The screenshot should show what the user gets, not what they click.
- Use real data where possible. A feature that shows realistic content reads as a real improvement. An empty state or placeholder data makes the feature look unfinished.
- Redact anything sensitive. Even in changelog screenshots, production dashboards can contain customer names, account IDs, or internal data. Clean the screenshot before it goes public.
Framing and styling for release visuals
A browser frame and a clean background transform a raw screenshot into something that looks designed. The settings that matter most for changelog visuals:
Browser frame
Adds context that this is a web product. Keep the frame style consistent — if you used a dark frame in the last release, use dark again. Switching between light and dark frames from release to release breaks visual continuity.
Gradient or solid
A subtle gradient behind the screenshot adds separation between the UI and the background. Choose a color that complements your product's brand, then save it. Use the same gradient every release.
Consistent spacing
Equal padding on all sides keeps the screenshot from feeling cramped. Pick a padding value that works at your standard export width and save it with your preset.
Depth
A light shadow under the browser frame gives the screenshot a lifted appearance without making it look heavy. Keep shadow intensity the same across all releases.
Save a preset — do this once
After your first changelog screenshot looks right, save it as a named preset in the Styles tab. Every subsequent release: capture the new feature, open FramedShot, apply the preset, export. The entire workflow from capture to export takes under a minute.
Named presets persist in your browser. You can have one preset for embedded changelog screenshots (wider aspect ratio, 2x scale) and a separate one for the social version of the same image (16:9 or 1:1, different export dimensions).
Showing before and after improvements
If the changelog entry is an improvement to an existing feature rather than something entirely new, a side-by-side before/after screenshot communicates more than either image alone. The reader can see exactly what changed without reading the description twice.
Use FramedShot's collage feature to place the old and new UI next to each other in one export. A two-slot side-by-side layout works well. Keep both screenshots at the same zoom level and viewport width so the comparison is fair.
Label the panels if needed — a simple "Before" and "After" text annotation is enough. Do not over-annotate a comparison image; the visual difference should do most of the work.
Export settings for changelog screenshots
- Embedded in a changelog page: Export at 2x scale as PNG. This ensures sharpness on retina displays where most users will see it.
- Shared on social alongside the release: Use the 16:9 preset for Twitter/X and LinkedIn, or 1:1 for posts that need to work across multiple platforms. See screenshot sizes for social media for exact dimensions.
- Sent in an email update or newsletter: JPEG at 85% quality keeps file size reasonable. Use PNG only if the screenshot has fine UI details that need to be preserved.
FAQ
What size should changelog screenshots be?
Export at 2x scale for embedded changelogs. For social sharing, 1200×630px (16:9) covers most platforms. Use a saved preset so every release matches — see the social media sizes guide for a full reference.
Should I use the same visual style for every entry?
Yes. Consistent framing across all changelog screenshots is more important than making each one individually perfect. Save a preset once and apply it every release.
How do I show before and after in one image?
Use FramedShot's collage feature to place old and new UI side by side. Keep both screenshots at the same zoom level. A short "Before / After" label is enough — the visual difference should be obvious without a long explanation.
Consistent changelog visuals in one browser-native workflow
Capture, style, and export polished release screenshots from Chrome — with saved presets so every update matches the last.
Install FramedShot free