Key takeaways
- A browser frame works best when the screenshot is already clean and tightly cropped.
- The biggest quality jump usually comes from spacing and background, not the frame chrome alone.
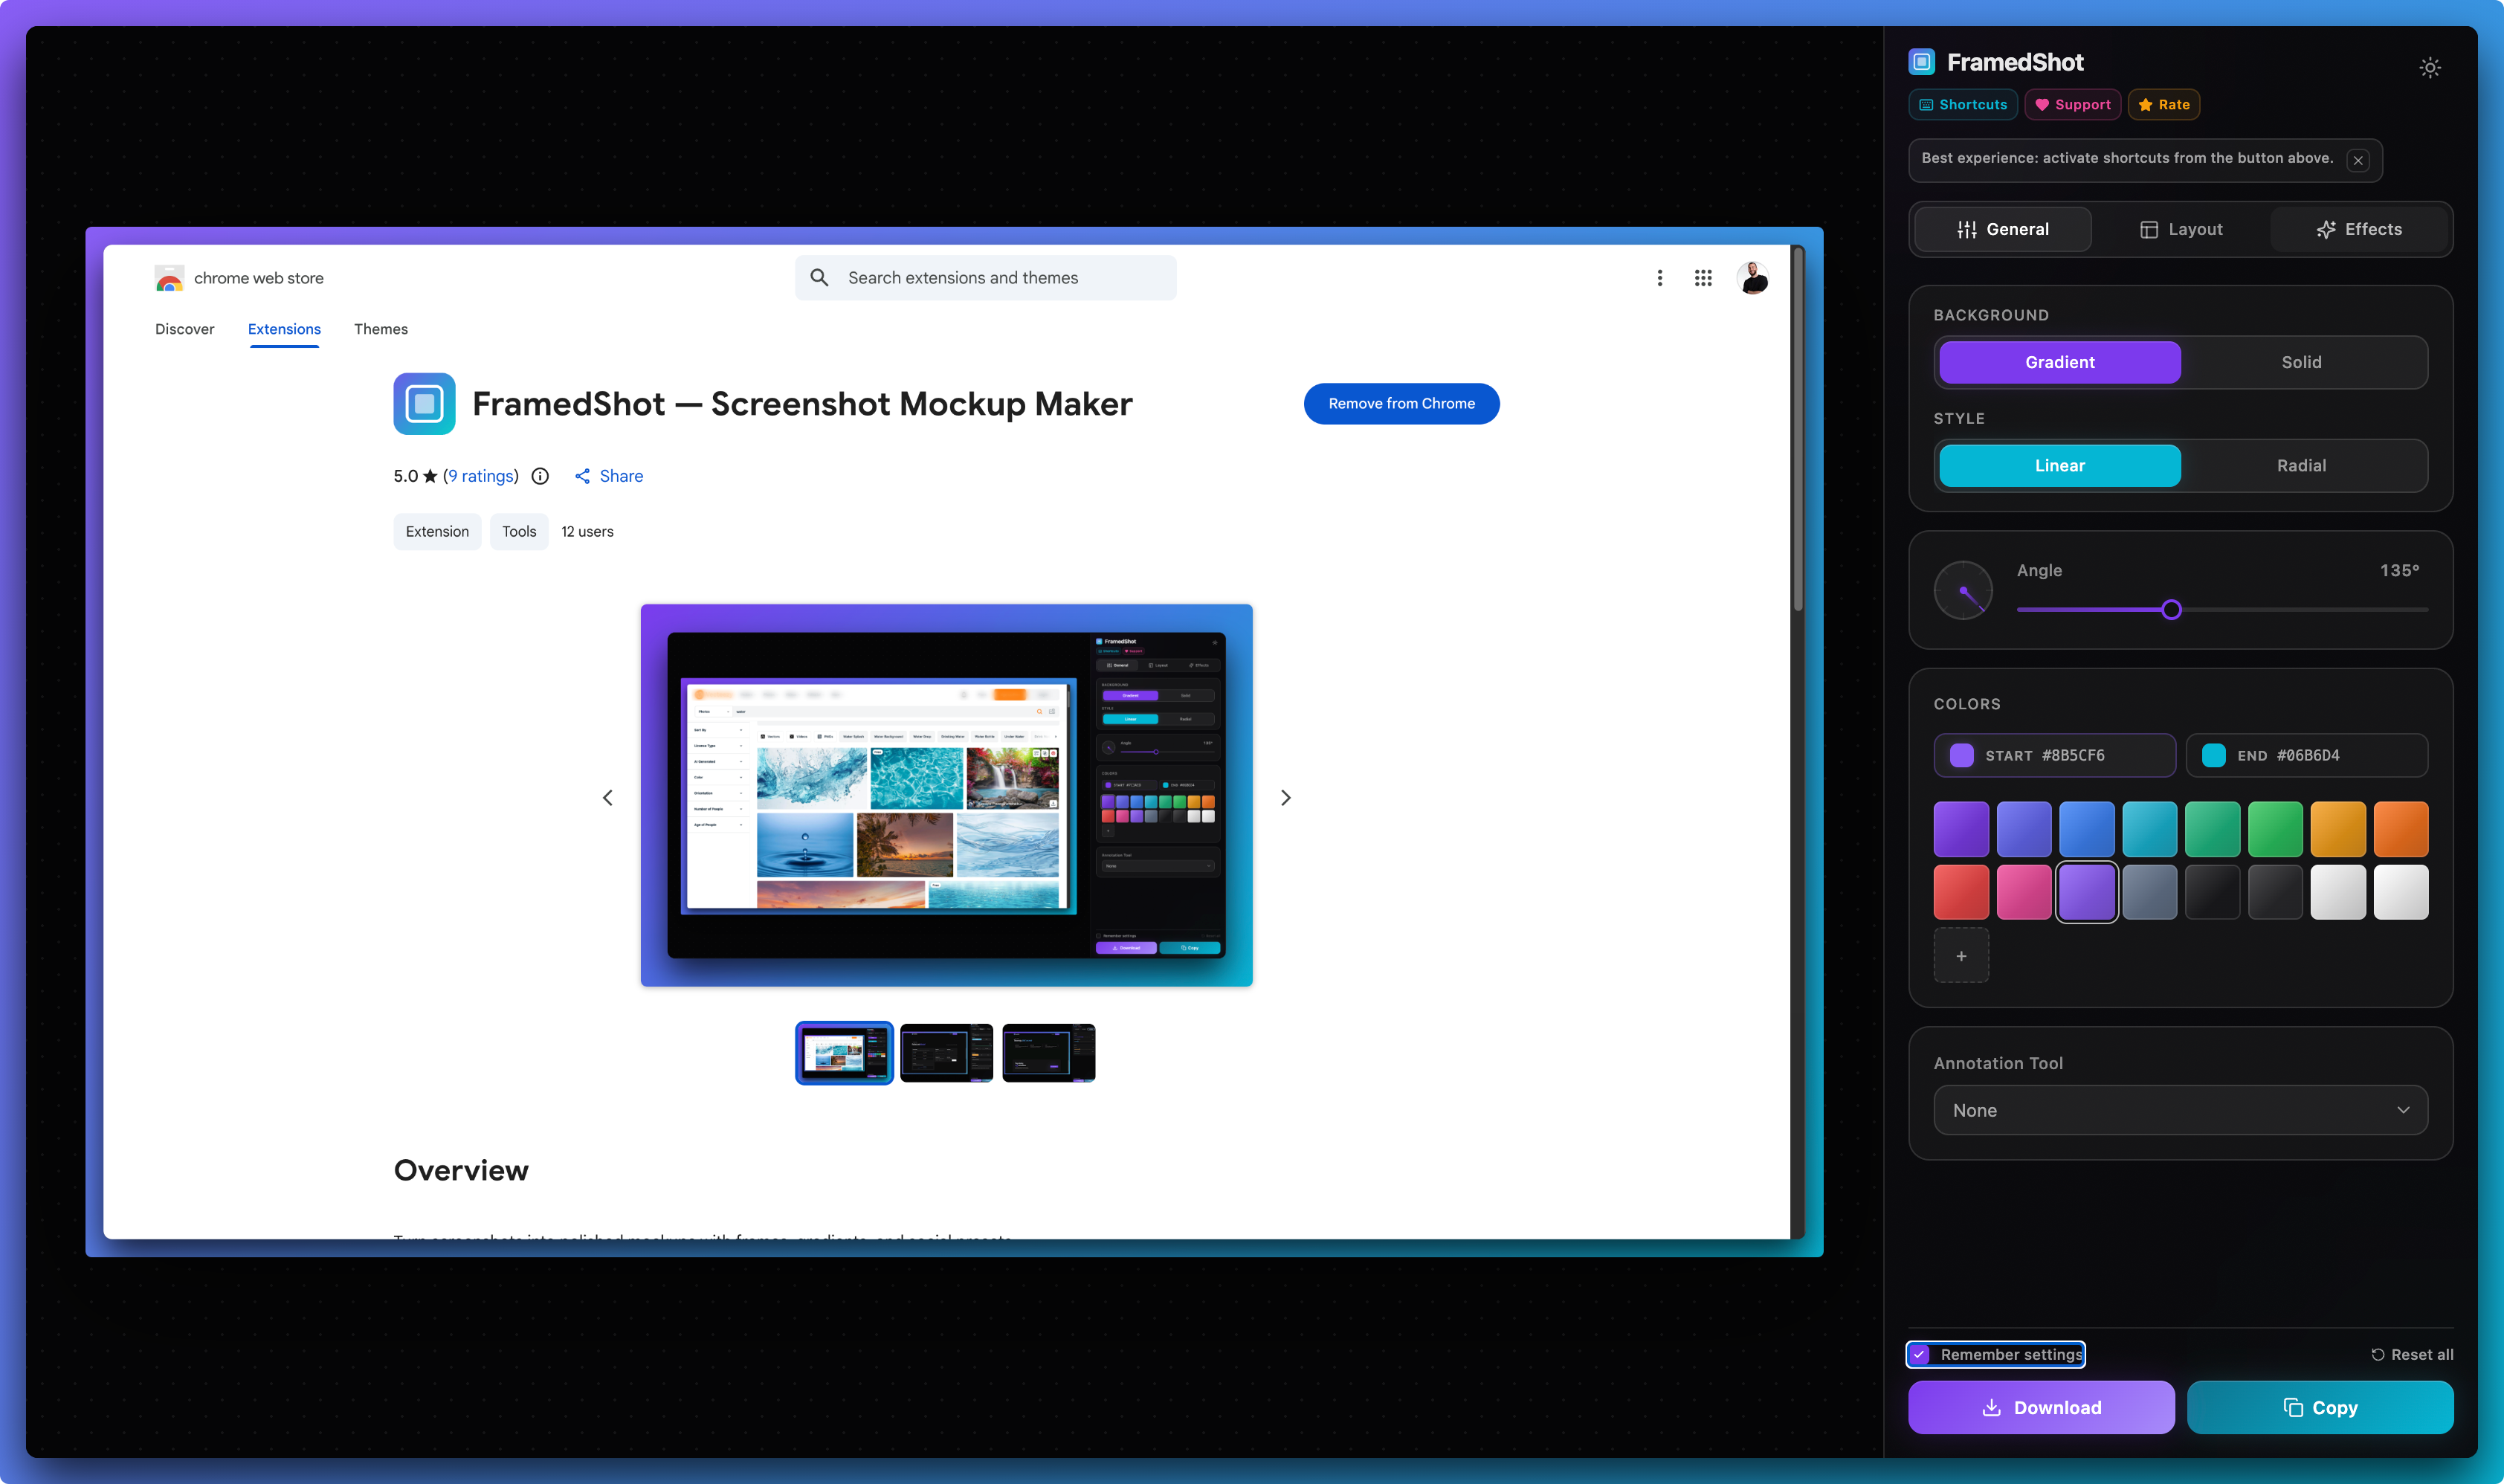
- In FramedShot, framing lives under the Layout tab — same session as capture and annotations.
- Export size should match where the screenshot will be published, not just how it looks in the editor.
Where it helps
Browser frames for real deliverables
Same technique, different audiences — the frame signals “this is a web product in context,” not a random crop.
Bug reports & QA
Tickets read faster when the window, URL bar, and page state read as one unit. Pair with annotations after the frame is set.
Docs & tutorials
Consistent framing across steps makes help articles feel like one series, not a pile of mismatched grabs.
Launches & changelog images
Update posts and release notes look intentional when every hero shot shares the same silhouette.
Product walkthroughs
Demos and sales decks benefit when the browser chrome anchors the story without extra design work.
SaaS product UI
Browser frames for SaaS screenshots
When the screenshot is a dashboard, analytics view, settings page, or admin panel, a browser frame makes the capture feel like deliberate product evidence — not a random crop. The frame answers “where does this UI live?” before the viewer reads a caption.
Dashboards & analytics
Charts and KPIs read better when the window chrome shows it is the live app. Use consistent framing across release posts so quarter-over-quarter screenshots match.
Admin & internal tools
Back-office UI is easy to mistake for a design file. A browser frame signals real software in context — useful for internal reviews and customer-facing docs.
Settings & billing
Long forms and tables look more intentional when padding and background separate the subject from the slide edge.
Reporting & exports
Wide tables and filters often need a tight crop first; then add the frame so the screenshot still reads as a browser surface.
When browser context helps SaaS screenshots
Use a frame when the story is “here is our web app / admin / customer-facing UI.” Skip it for ultra-tight crop callouts (single control, icon) where the frame adds noise — same rule as when not to use a browser frame. For mixed audiences (exec + IC), framing makes SaaS product screenshots scannable in one glance: tabs and URL bar carry environment without extra copy.
Why browser frames help
When you share a browser screenshot without context, the result can feel flat. A viewer sees the content, but not the environment. A browser frame restores that missing context in a light way: tabs, address bar, spacing, and a little visual structure around the image.
That matters in a few common cases:
- Product launches: a framed screenshot looks closer to a deliberate product visual than a random capture.
- Portfolio work: the frame shows that the design or feature lives in-browser.
- Changelog and documentation images: the frame makes screenshots feel consistent across several pages.
- Build in Public posts: the finished image looks faster to read while still feeling native to the browser.
The fastest ways to add a browser frame
1. Design tools
Figma, Photoshop, and similar tools work when you want full control. The downside is that they add a round trip. You have to capture, import, place the image, style the frame, then export. That is fine for one hero asset, but slow for a daily screenshot workflow.
2. Online mockup tools
Upload-based tools are quicker than a design file, but they still interrupt flow. You usually move the image out of the browser, wait for upload, tweak the design, then download it back again. That is convenient for occasional use, but less ideal if speed and privacy matter.
3. Browser-first tools
If your work already starts inside Chrome, the fastest path is to capture and edit in place. That is where a tool like FramedShot fits well: visible-tab capture or area selection, then frame, background, and export without bouncing across tools.
A fast FramedShot workflow
The point of a browser frame is not to make the UI look more decorated. It is to make the screenshot easier to publish. A strong workflow looks like this:
- Capture only the useful part. If the full browser window contains noise, start with a tighter visible-tab crop or selection. The frame should support the image, not rescue a messy capture.
- Add the browser frame early in the Layout tab. Once the screenshot is inside the editor, enable the frame before you start tuning backgrounds and padding. That gives you the right silhouette to design around.
- Set outer padding generously. A framed screenshot needs room to breathe. Too little padding makes the image feel cramped. Too much makes it float. Aim for balance first, then fine-tune.
- Choose a background that supports the product, not competes with it. Neutral gradients, subtle contrast, and controlled shadows usually outperform loud backgrounds.
- Export for the destination. A screenshot meant for X, LinkedIn, or a changelog page should not all use the same size by default. Pick the right preset or check the platform dimensions before export.
Design choices that make the frame feel intentional
- Keep the frame clean. The screenshot is the main subject. The frame should organize it, not steal attention.
- Match the roundness. If the browser frame is soft and rounded, the image corners should not feel sharply disconnected.
- Use contrast sparingly. A strong drop shadow plus a loud gradient plus a thick frame is usually too much. Pick one strong move.
- Think about text overlays. If the screenshot is going into a social post with caption text around it, simpler framing usually wins.
- Test at actual display size. What looks balanced in a full editor view can feel oversized once the image is embedded in a tweet, doc, or landing page.
When not to use a browser frame
Not every screenshot needs one. If the image is already part of a bigger composition, or the crop is extremely tight around a UI detail, a browser frame can create noise. The rule is simple: if the frame adds context, keep it. If it adds only decoration, remove it.
FAQ
Should every product screenshot use a browser frame?
No. Use it when the browser context helps the story. For isolated UI details, docs callouts, or cropped states, a plain framed image can be too heavy.
Is a browser frame better than a device mockup?
For browser-based products, usually yes. It is simpler, more honest to the source, and quicker to produce. Device mockups make more sense when the product experience is primarily mobile or hardware-tied.
What matters more: the frame or the background?
Usually the background and spacing. A weak background makes the screenshot look ordinary even with a nice frame. A clean background plus good padding can often do more than the frame alone.
Should SaaS screenshots use a browser frame?
Often yes for dashboards, admin panels, analytics, and settings — the frame shows the UI lives in a real browser. For a single-button callout, skip the frame if it adds clutter.
Do browser frames help for admin dashboards and analytics views?
Yes when you need stakeholders to recognize the surface as live product UI. Framing keeps dense tables and charts from floating without context on a slide or doc.
Make framing faster in Chrome
Add FramedShot, then use the browser mockup generator for install-first, Layout-tab framing — tool intent. This guide covers workflow / how-to for SaaS and product screenshots. Task pages: add a browser mockup to a screenshot, screenshot frame tool. No install needed? Make a browser mockup online.
Install FramedShot